
A config modifier contains custom instructions for processing data at an indicated log processing stage. Learn more about config modifiers.
- All environment users can view config modifiers. However, a user must be assigned to an engineer or a support role to manage config modifiers. Learn about user roles.
- To create a config modifier within log inspector, you must have logs for the subscription you need a config modifier for.
Follow these steps to view any existing config modifiers in your environment.
- Log in to the Redox dashboard.
- From the navigation menu, click the Operations drop-down.
- The Operations options expand. Click the Config modifiers option.
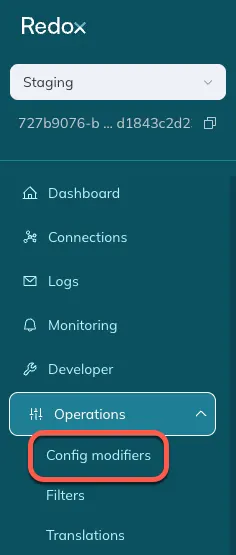
Config modifiers in the side nav - All existing config modifiers in the environment appear.
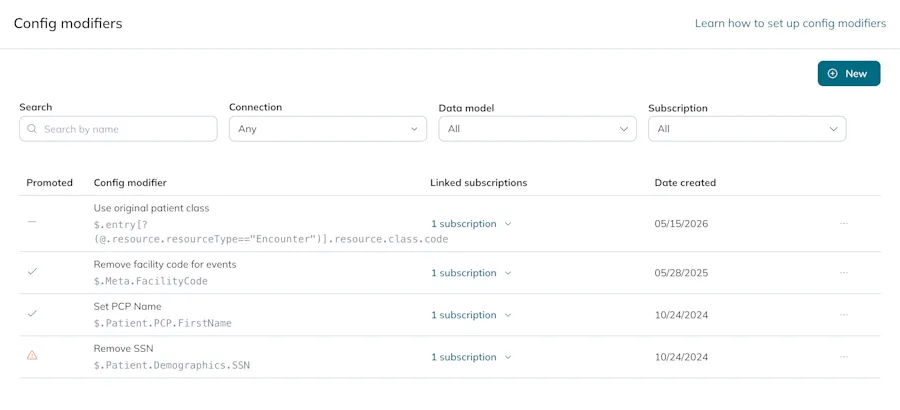
View existing config modifiers - (Optional) Use the filters at the top of the page to narrow down the list of config modifiers.
- Search: Type in a config modifier’s name into the search bar.
- Connection: Pick from the list of available connections.
- Data model: Pick from the list of data models and FHIR® resources. You can only pick one data model or resource at a time.
- Subscription: Pick from the list of source and destination combinations. This is useful if you’re searching for a specific config modifier link.Result tips

Config modifier filters
- (Optional) Click on a config modifier row to view the Details page, which includes the name, version, selector path, flavor, created and updated dates, and links.
There are two places you can create config modifiers:
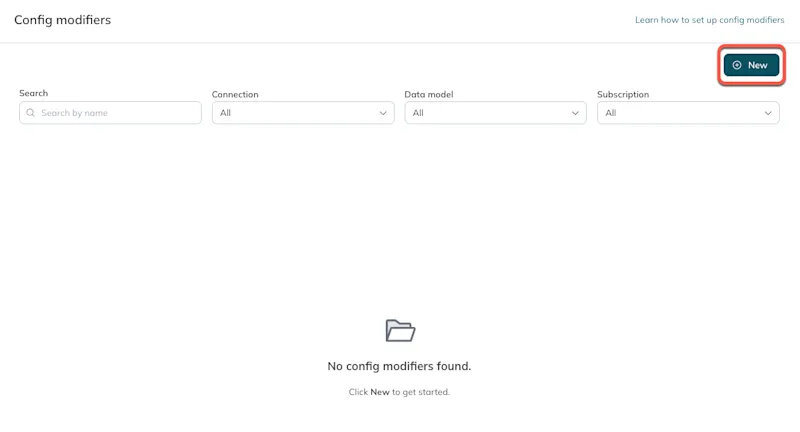


- Operations > Config modifiers tab: Create a config modifier without an existing log or live traffic. This option is useful if you’re configuring before go-live.



- Log inspector: Create a config modifier within the context of a log. This option is useful if you’re responding to an issue with live traffic and want to implement logic reactively.
In both options, Config Modifier Assistant is available for writing the schema and testing is optional. Review the table below for differences.
Config modifier tab | Log inspector | |
|---|---|---|
Best when | You have similar subscriptions but want to create or multi-link config modifiers before go-live. | You need to create config modifiers within the context of live traffic. |
Multi-linking availability | Yes You can select one or more subscriptions to link to when you create. | No You have to select one log and subscription at a time to create. |
Copy from an existing config modifier | The Copy option is available in the config modifiers table, in the three-dots icon of the config modifier you want to copy. | The Copy from existing option is available when you click any config modifier tab in the log stages list. |

Write or choose the selector path | You must write the selector path from scratch since this is outside the context of a subscription. | You can write or choose the selector path from a drop-down with options based on the subscription you're in. |

Provide a sample payload | You must provide your own sample JSON payload to use Config Modifier Assistant or to test before saving. | The selected log provides a sample JSON payload. |

Whenever you edit, you create a new version of the config modifier. You might want to promote or restore versions, in case of troubleshooting.
- Follow the steps to view config modifiers.
- Find the config modifier you want to edit and click anywhere in its row.
- The Details page opens. Under the Config modifier details section, click the Edit button.
- The edit form opens so you can edit the subscription(s), name, flavor, selector, or schema. Edit any of the fields, then click the Save button.Editing selected event types


Edit a config modifier - (Optional) Test your changes. Remember you must provide a sample payload to test with when creating or editing on the Config modifiers tab.
- If editing within log inspector, a sample payload is provided for you. In log inspector, you can re-run all the operations to see how this config modifier works with all the operations in a log.
- Click the Save button.
- If editing a config modifier with multiple links, a modal opens with affected subscriptions. Click the Save changes button to continue or the Cancel button to discard edits.
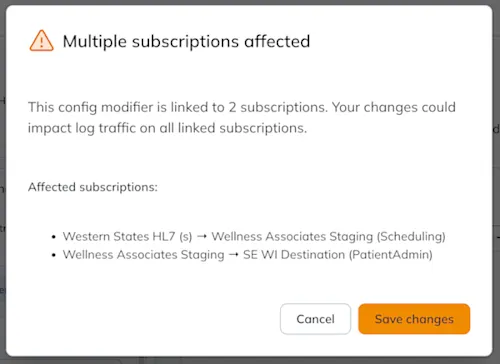
Review affected subscriptions - If editing within log inspector in a production environment, a confirmation modal opens. Click the Apply button. This immediately applies the edited config modifier to the selected subscription and event type(s) for real-time traffic. If you click the Cancel button, any changes are discarded.

Apply edits
- This creates a new version of the config modifier. If you’re editing a staging asset, you may need to re-promote to production.
You must first delete any config modifier links in order to delete a config modifier.
- Follow the steps to view config modifiers.
- Find the config modifier you want to delete and click anywhere in its row.
- The Details page opens. Click the Delete button.Can’t delete a linked config modifier
- A confirmation modal appears. Click the Delete button to proceed.

Delete a config modifier
Follow these instructions if you didn’t link a config modifier when creating or you want to add more links. A config modifier can be linked to multiple subscriptions.
- Follow the steps to view config modifiers.
- Find the config modifier you want to link and click anywhere in its row.
- The Details page opens. Fill out the fields under the Links section.
- From the Connection drop-down, select the connection you want to link the config modifier to.
- Click the Subscription drop-down. A modal opens with a list of the selected connection’s subscription(s). Click the radio button of the subscription you want, then click the Select button.Link one subscription at a time
- (Optional) Click the Event type drop-down to select which event type(s) to link to. By default, All event types are selected.
- From the Processing drop-down, select the log stage to link the config modifier to. Review our technical reference below about how linking works.
- Click the Link button.

Add a link to a config modifier - Repeat these steps for as many links as you need.
- Follow the steps to view config modifiers.
- Find the config modifier with link you want to review and click anywhere in its row.
- The Details page opens. Under the Links section, you can view, add, or delete links.
- To view an existing link in context, click the link to open related logs.Default to all event types
- To add a new link, follow the steps for creating a link.
- To delete an existing link, click the three-dots icon, then the Delete option. A confirmation modal opens. Click the Delete button to continue or the Cancel button to discard the changes.

Delete a config modifier link
If a subscription has multiple config modifier links, you can set the order that they should process in outside of log inspector.
Config modifiers with no explicit order run under our standard logic:
- The put flavor config modifiers execute before any delete flavors.
- Within each of flavor category, the order is determined by the created at date.
- If a group of config modifier links is only partially ordered, explicitly ordered ones run first, then unordered ones follow by created at date.
- Follow the steps to view config modifiers.
- Find the config modifier with link you want to manage and click anywhere in its row.
- Under the Links section, find the link you want to re-order and click the three-dots icon.
- Click the Edit processing order option.
- A modal opens. Drag and drop the links in the order you want them to process in.
- Click the Save order button.

Set processing order
After testing in staging, you can promote a config modifier to production. Learn about promoting assets.
- Follow the steps to view config modifiers.
- From the Environments drop-down, make sure you’ve selected the Staging environment.
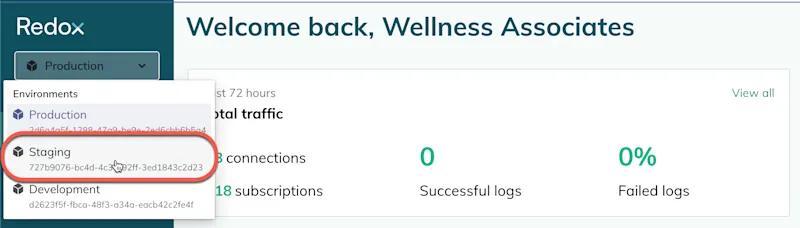
Select the staging environment - Find the config modifier you want to promote and click anywhere in its row.
- The Details page opens. Click the Promote button.
- A modal appears to let you know you’re exiting the staging environment and proceeding to the production environment. Click the Proceed button. Otherwise, click the Cancel button to discard the promotion.

Promote a config modifier to production - The Settings page in the production environment opens.
- To make any changes to the config modifier, click the Go to Staging button.
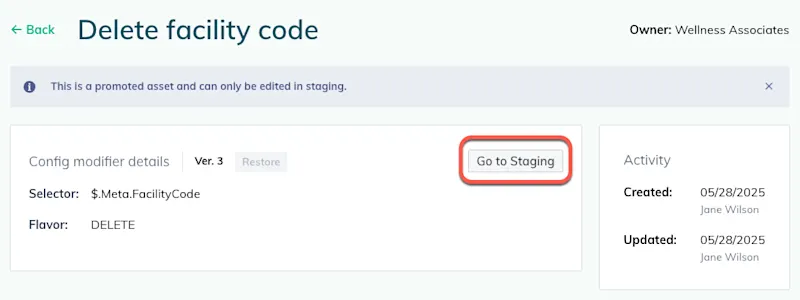
Go to staging to edit - A modal appears to confirm that you want to switch environments. Click the Proceed button to continue.
- The config modifier settings page opens in the staging environment. Open the logs for that config modifier, then follow the instructions to edit a config modifier.No edit button
- Once changes are successfully made, re-promote the config modifier to keep the assets in sync across environments.
- Next, add link(s) to subscriptions to apply the config modifier in your production environment.
You can restore a version of a config modifier that’s not currently in use. This might be helpful when troubleshooting to see where an error may have been introduced or to resolve an error by using a version that worked previously.
- Follow the steps to view config modifiers.
- From the list of existing config modifiers, click on the config modifier you want to update.
- The Settings page opens. Click the Restore button.

Click the Restore button - A modal appears to restore a version. From the drop-down, select a version to restore.Restore notes
- The diff view shows what’s different between the current and selected version. Review the differences. When finished, click the Restore button.Versions after editing

Compare config modifier versions - For promoted assets, restoring a version only applies to the current environment. If you restore a version in staging, you may need to re-promote the asset if you want to apply it to production as well.
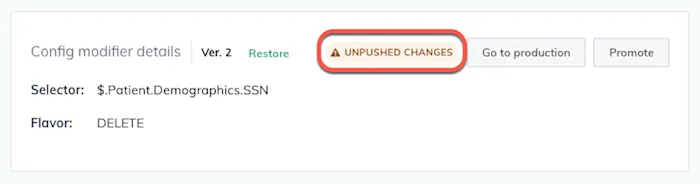
Unpushed changes 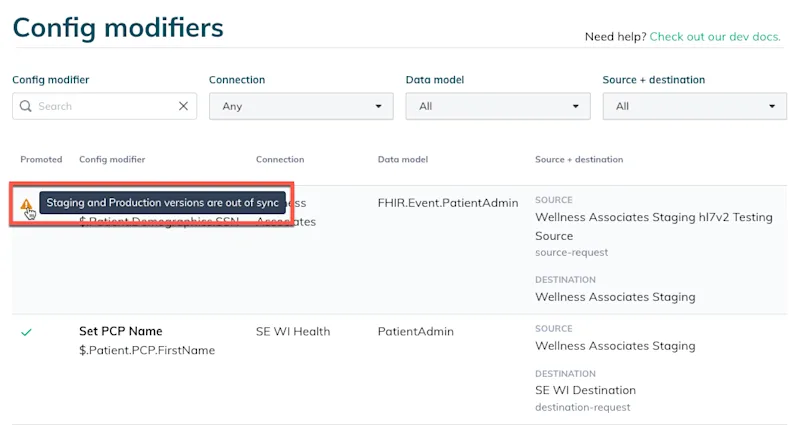
Out of sync versions
To run a config modifier, you must link it to the correct:
- subscription
- event type(s) within that subscription
- log stage, or processing location
You can link config modifier(s) to the log stages your organization manages (learn about log stages), and so can your connection.
In log inspector, you’ll see both source-managed and destination-managed tabs for config modifiers. These appear for each relevant processing stage. If you don't manage both sides of the exchange, you won't see tabs for processing locations if your connection hasn’t linked any config modifiers there. If they have, you’ll see the config modifiers they’ve created, but you won’t have permission to create config modifiers in their location.
Processing stages have two different parts for link config modifiers: one that’s source-managed and one that’s destination-managed. You can only link config modifiers to the part of the stage that your organization manages.
For example, if your organization manages the source, you can’t link a config modifier to a destination-managed part of a processing stage.
Available log stages are determined by the type of data exchange (i.e., async or sync) and whether your organization owns either the source, destination, or both. If you own both the source and destination, you can link to all of the listed stages.
- Post-processing, outbound
- source-request (source-managed)
- source-request (destination-managed)
- destination-request (source-managed)
- destination-request (destination-managed)
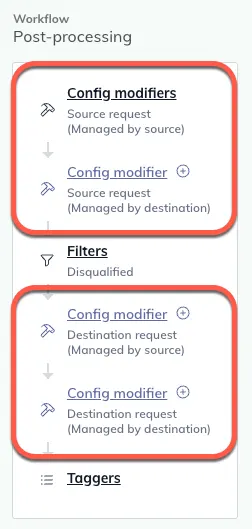
- Post-processing, outbound (1st half of exchange)
- source-request (source-managed)
- source-request (destination-managed)
- destination-request (source-managed)
- destination-request (destination-managed)
- Pre-processing, inbound (2nd half of exchange)
- destination-response (destination-managed)
- destination-response (source-managed)
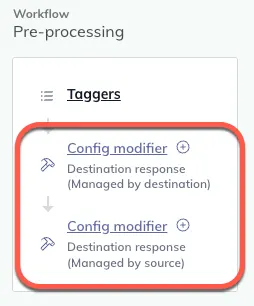
- Post-processing, inbound (2nd half of exchange)
- source-response (source-managed)
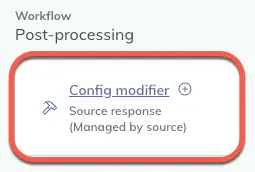
The Redox Process stage(s) happen in the middle, both going to and back from a destination. This is when we convert data into a Redox data model or Redox FHIR® resource format.
You can’t link config modifiers to Redox Process stages. That means you have to decide whether to link before or after Redox processing. The location to link depends on your selector:
- Link before processing if the selector exists in our standard data models or FHIR® resources (i.e., your config modifier alters values, like timestamp format, or fields within the Redox format). Changes to values or formats of values are retained during Redox processing since you’re not moving fields around.Available stages for linking before Redox processing
- Link after processing if the selector doesn’t exist in our standard data models or FHIR® resources (i.e., your config modifier alters the shape of data or selectors outside of Redox formats). This is a safety precaution so that changes made by your config modifier don’t get unintentionally erased or ignored during Redox processing. Other changes that don’t fit in our standard formats might also be ignored.Available stages for linking after Redox processingExpected data formats