Last updated: Jan 13, 2026
DEVELOPER
IMPLEMENTATION
HEALTH TECH VENDOR
We offer single sign-on (SSO) to the Redox dashboard using your own third-party identity provider (IdP). Redox serves as the service provider (SP) in your SSO flow.
SSO helps you control user access policies with a central resource for your organization.
- Your IdP must support a SAML protocol.
- You must support a service provider (SP)-initiated login (i.e., login initiated from the Redox dashboard, not your IdP).
- You must be assigned to an organization owner role in Redox to configure SSO. Learn about user roles.
- SSO is an advanced feature and must be enabled in your Redox organization. Talk to your Technical Account Manager if it’s not enabled.
- SSO is only for single Redox organization users. If your organization has users that are part of multiple Redox organizations, they must remove themselves or transfer access to a different Redox account before using SSO.
- (Recommended) Test the SSO configuration with your IdP before enabling SSO in the Redox dashboard. For example, check if users can log in to the IdP as expected. This confirms that your system works with the IdP before adding Redox into the mix.Test before enabling SSO
If you’re an organization owner, follow these steps to enable SSO.
- Log in to the Redox dashboard.
- In the bottom-left navigation menu, click your username to open the user menu.
- From the user menu, select the Organization Profile option.
![The Organization Profile option is the second option of the user menu. The Organization Profile option is the second option of the user menu.]()
Organization Profile option of the user menu - By default, the Organization Info page displays. Click the Settings tab.
- The SSO information displays. First, we provide the Redox authorization server values. Use the Connection name value and Audience restriction value in your IdP configuration.
![Redox authorization server values Redox authorization server values]()
Redox authorization server values - Next, the Identity provider configuration contains details about your IdP. Specific configuration details vary between IdPs, but the basic process is the same. Fill in the relevant fields:
- Name: Enter a human-readable name to represent your IdP.
- Domain name: This field automatically populates with the company domain and isn’t editable. The domain is where your organization’s users have an email account.
- Configuration mode: Select either the URL Import or Manual option.
- URL import: Enter the public URL for your SAML metadata XML document. Redox pulls the entity ID and keys to validate the response from the IdP.
![IdP configuration - Import option IdP configuration - Import option]()
IdP configuration - Import option - Manual: Provide the entity ID and keys yourself.
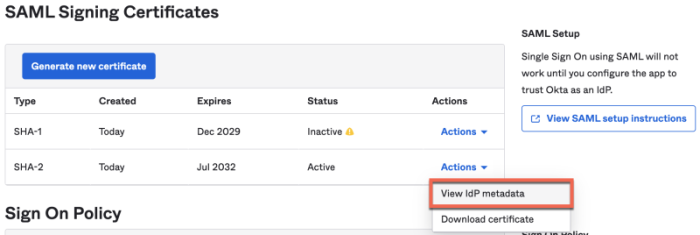
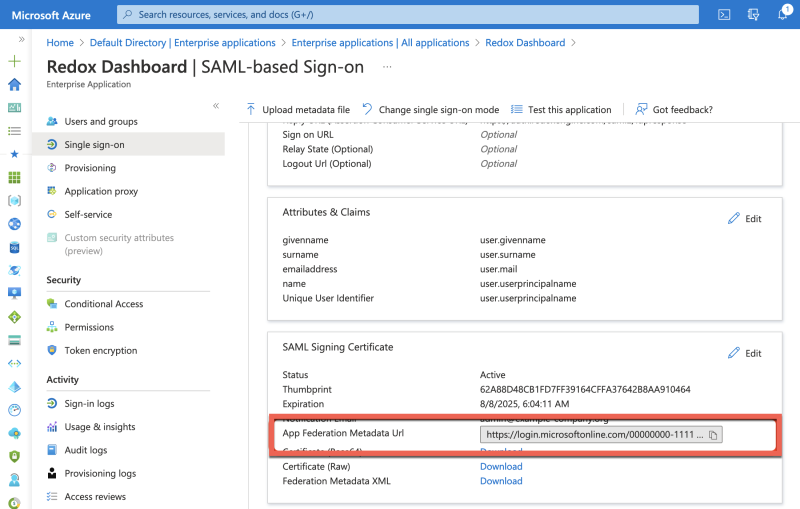
- Signing certificate: Enter the public key that your IdP uses to sign requests. This should be an X.509 certificate encoded in PEM or CER format. Review the instructions for locating and downloading the certificate for your relevant IdP in the Step 2 section.
- Sign-in URL: Enter the redirect URL for your users to log in to the IdP.Redox Sign-in URL v. IdP Sign-in URL
![IdP configuration - Manual option IdP configuration - Manual option]()
IdP configuration - Manual option
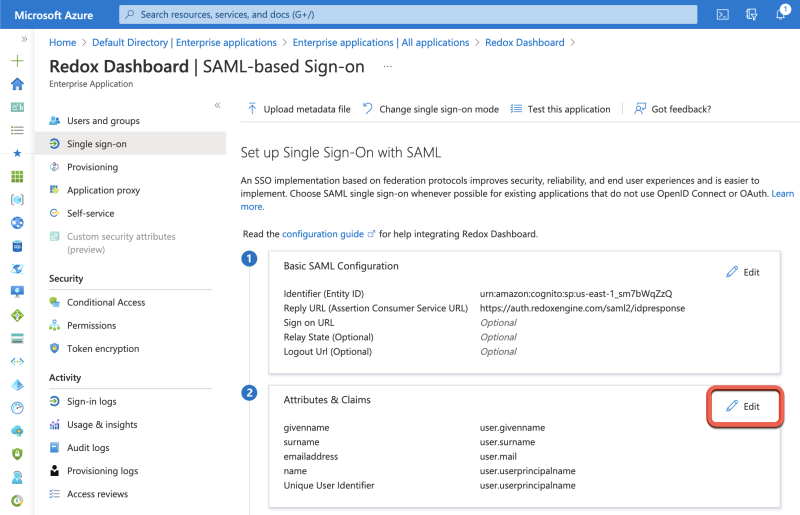
- Confirm the Attribute mapping. These fields populate automatically, but you should confirm them or adjust as needed.
![IdP configuration - Attribute mapping IdP configuration - Attribute mapping]()
IdP configuration - Attribute mapping - User full name: The name of the SAML attribute that your IdP uses for a user’s full name.
- User email: The name of the SAML attribute that your IdP uses for a user’s email address.
- Click the Save button.
- When successfully saved, the Enabled for Organization toggle appears and is set to ON. To disable SSO later, toggle this option to OFF.
![SSO enabled for your organization SSO enabled for your organization]()
SSO enabled for your organization - Next, configure the SAML protocol. We provide instructions for some common IdPs in the Step 2 section.
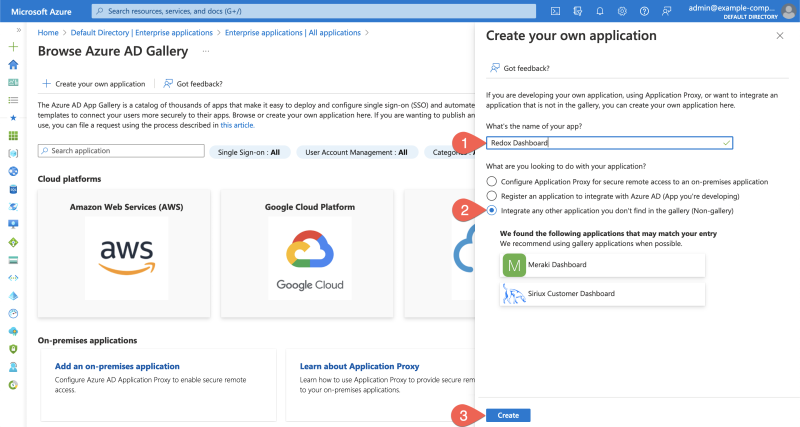
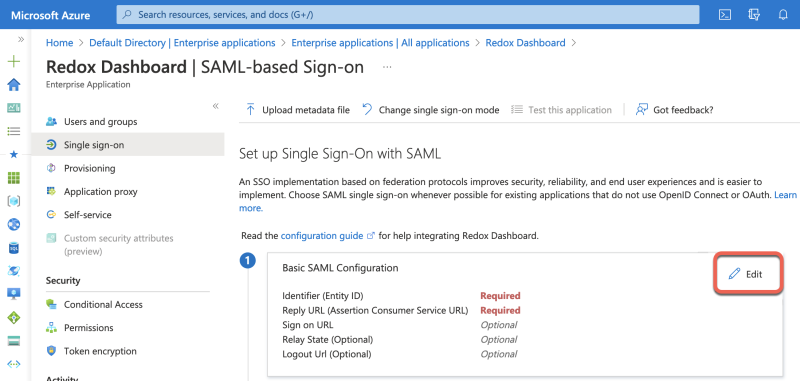
We provide instructions to configure the SAML protocol for common IdPs.
Only SP-initiated logins
Where to find the Connection URL
Once SSO is successfully enabled in both the Redox dashboard and your IdP, all users must log in with SSO. Any previous Redox credentials will no longer work.
- Navigate to the Redox dashboard.
- Enter your email address in the login page.
- You’re redirected to your IdP for authentication.
- If successful, you’re redirected back to the Redox dashboard as a logged-in user.
- If unsuccessful, refer to our troubleshooting tips.
How users are handled in your IdP


